05 Jun How to Organise Canva Folders, Templates and Brand Kits for Multiple Clients
Canva is one of the most useful tools for creating social media graphics, blog headers, presentations, adverts and marketing materials.
But if you manage content for multiple clients, it can quickly become cluttered.
You may find yourself:
- clicking old Canva links that take you to the homepage instead of the design
- mixing client work together
- losing templates
- duplicating graphics unnecessarily
- struggling to find logos, colours or approved assets
If that sounds familiar, you are definitely not alone.
The good news is that a simple organisation system can make Canva much easier to manage, especially if you work across multiple businesses or brands.
This guide walks through a practical way to organise Canva so it becomes easier to use, easier to scale and far less stressful.
Why Canva Gets Messy So Quickly
 One of Canva’s strengths is how easy it is to jump in and start designing.
But without a structure, designs quickly pile up.
Common Canva problems include:
- client work mixed together
- “Copy of…” designs everywhere
- inconsistent naming
- old versions saved in random places
- missing logos or colours
- duplicate templates
- confusion over which design is the latest version
This becomes even more difficult when you manage:
- multiple clients
- several social media platforms
- blog graphics
- adverts
- presentations
- reusable templates
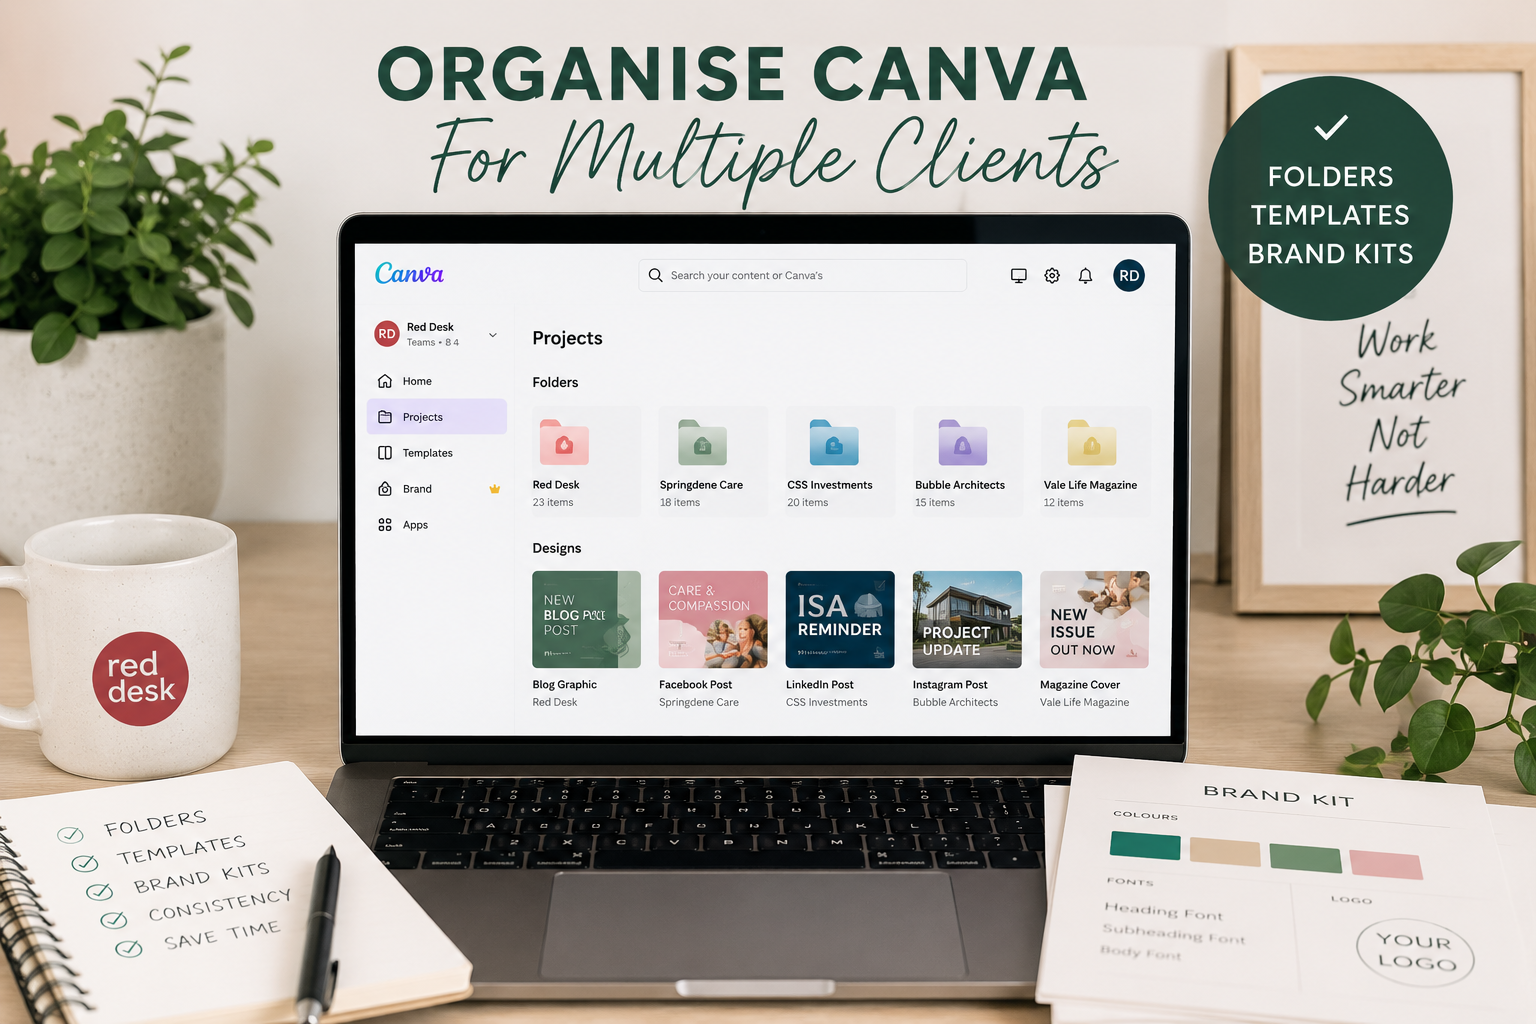
Step 1: Create a Folder System for Each Client
The best starting point is to treat Canva like a filing cabinet.
Create a main folder for every client or business.
Example:
- Red Desk
- Springdene Care Homes
- CSS Investments
- Vale Life Magazine
- Bubble Architects
- Shoto Karate
Then create subfolders inside each one.
Suggested structure:
- Brand Assets
- Social Media Templates
- Blog Images
- Ads
- Presentations
- Final Exports
- Archive
This immediately makes Canva easier to navigate.
Where to Find Canva Folders
On desktop:
- Open Canva
- Go to the left-hand menu
- Select Projects
- Click Folders
- Select Create new folder
You can then add:
- client folders
- template folders
- archive folders
- campaign folders
Tip: using emojis or colour themes in folder names can help you visually identify clients more quickly.
Step 2: Use a Clear Naming System
 A naming system sounds boring, but it saves a huge amount of time later.
Good file names should include:
- client name
- platform
- topic or campaign
- month or year
Examples:
- Red Desk – Instagram – Canva Blog – May 2026
- CSS – LinkedIn – ISA Reminder – April 2026
- Bubble – X Post – Housing Scheme – Planning
- Springdene – Blog Header – Intergenerational Week
Avoid vague names such as:
- Untitled Design
- Copy of Design
- Instagram Post Final FINAL
- New Design 2
The clearer the name, the easier Canva search becomes later.
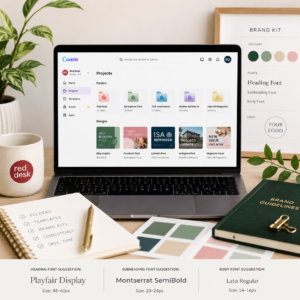
Step 3: Set Up Brand Kits for Each Client
If you use Canva Pro, Brand Kits are one of the best features for multi-client work.
They allow you to store:
- logos
- fonts
- colour palettes
- graphics
- imagery
- templates
for each client separately.
This helps maintain consistency and saves a lot of time when switching between brands.
Where to Find Brand Kits
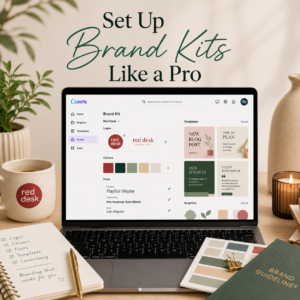 If you use Canva Pro:
- Open Canva
- Select Brand from the left-hand menu
- Click Brand Kits
- Create a new Brand Kit for each client
You can then upload:
- logos
- HEX colour codes
- fonts
- approved graphics
- templates
This becomes especially useful if clients have strict branding guidelines.
Step 4: What to Do If You Use Canva Free
You can still organise Canva well without Canva Pro.
With Canva Free you can still:
- create folders
- upload logos
- organise projects
- duplicate designs as templates
- save favourite elements
The main difference is that branding often needs to be managed more manually.
A helpful workaround is creating a “Brand Reference” design for each client.
This can include:
- logos
- colours
- font names
- social media sizes
- example layouts
- tone/style notes
Save this inside the client’s folder so it is always easy to find.
Step 5: Use Templates, Not Random Duplicates
One of the biggest Canva mistakes is endlessly duplicating old posts.
Instead, create reusable templates for each client.
Examples:
- Instagram square posts
- Facebook posts
- LinkedIn graphics
- X/Twitter graphics
- Google Business posts
- Blog featured images
- Quote graphics
- Event announcements
This keeps branding consistent and speeds up content creation dramatically.
How to Create a Reusable Template
Once you have created a design:
- Open the design
- Click Share (top right)
- Choose:
- Template link
- or duplicate it manually into your Templates folder
This protects the original design from accidental edits.
Step 6: Separate Working Designs From Finished Designs
This is one of the easiest habits that prevents Canva chaos.
Separate:
- drafts
- templates
- finished graphics
- archived campaigns
Suggested structure:
Working Designs
Designs currently being edited.
Approved Templates
Master versions you reuse regularly.
Final Exports
Graphics already published or approved.
Archive
Old campaigns, expired offers or seasonal content.
This stops you accidentally editing the wrong version later.
Step 7: Save Canva Links Properly
A common frustration is clicking a Canva link and ending up on the Canva homepage or Projects screen instead of the correct design.
This often happens because:
- the design was moved
- permissions changed
- folders were reorganised
- multiple Canva accounts are logged in
Create a “Master Canva Links” Spreadsheet
This is one of the simplest ways to stay organised.
Track:
- client
- design name
- platform
- Canva link
- status
- notes
Example:
| Client | Design | Platform | Status |
| Red Desk | Canva Blog Graphic | Draft | |
| CSS | ISA LinkedIn Post | Published | |
| Bubble | Planning Graphic | X | Approved |
This means you are not relying on Canva’s homepage or search history.
Step 8: Use Sharing Permissions Carefully
If you collaborate with clients or other team members, sharing settings matter.
Before sending a link, check whether they should:
- view only
- comment
- edit
- use as template
For most client work, template links or view-only access are usually safer than allowing edits to the master design.
Where to Manage Sharing Permissions
Inside a design:
- Click Share
- Adjust permissions:
- View
- Comment
- Edit
- Template use
This helps prevent accidental changes to approved graphics.
Step 9: Canva Tips That Save Time
Use Starred Designs
Star your most-used templates so they are easier to find quickly.
Keep One “Master Template”
Avoid editing your original template directly.
Use Consistent Thumbnail Styles
This makes folders easier to scan visually.
Archive Old Campaigns
Move outdated seasonal or promotional graphics into archive folders.
Use Canva Search Properly
Search using:
- client name
- platform
- campaign name
- month/year
rather than vague terms.
Step 10: Do a Monthly Canva Tidy-Up
Even a well-organised Canva account needs maintenance.
Set aside 20–30 minutes each month to:
- move designs into correct folders
- archive old campaigns
- remove duplicates
- update logos
- check templates
- tidy file names
Small tidy-ups prevent Canva becoming overwhelming.
Canva Free vs Canva Pro
Canva Free
Best for:
- occasional use
- one business
- simple graphics
- manual organisation
Limitations:
- less branding flexibility
- more manual processes
- fewer premium assets
Canva Pro
Best for:
- multiple clients
- social media management
- reusable templates
- organised branding
- larger content libraries
Useful features include:
- Brand Kits
- premium templates
- team collaboration
- template sharing
- larger storage
Canva for Nonprofits
Worth noting for charity clients: Canva offers eligible nonprofits access to premium features through Canva for Nonprofits.
This can be especially useful for charities managing volunteers, events and social media content on limited budgets.
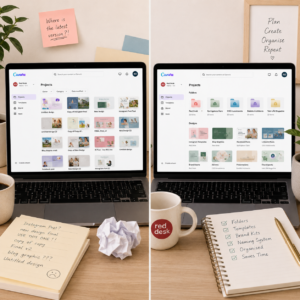
A Simple Canva Structure You Can Copy
Example setup:
- Client Name
- Brand Assets
- Templates
- Social Media
- Blog Images
- Ads
- Final Exports
- Archive
Then create a:
“Client Brand Reference” design
Include:
- logos
- colours
- fonts
- tone notes
- post sizes
- important links
- example graphics
This becomes a quick visual reference point for each client.
Final Thoughts
Canva becomes much easier to manage when it is treated like a proper workspace rather than a dumping ground for random designs.
A simple folder structure, clear naming system and reusable templates can save hours of time, especially if you work across multiple clients.
The goal is not perfection. It is creating a system that makes your daily work faster, easier and less stressful.
Need Help Organising Your Marketing Systems?
At Red Desk, I help businesses organise their marketing, social media and digital systems so they work more efficiently.
Whether you need support with content creation, SEO, Google Business optimisation or managing multiple marketing channels, I can help you create practical systems that save time and reduce overwhelm.
Sorry, the comment form is closed at this time.